Building a Cedar Privacy Screen for Your Deck That Actually Blocks the View

What You'll Learn About Building a Privacy Screen
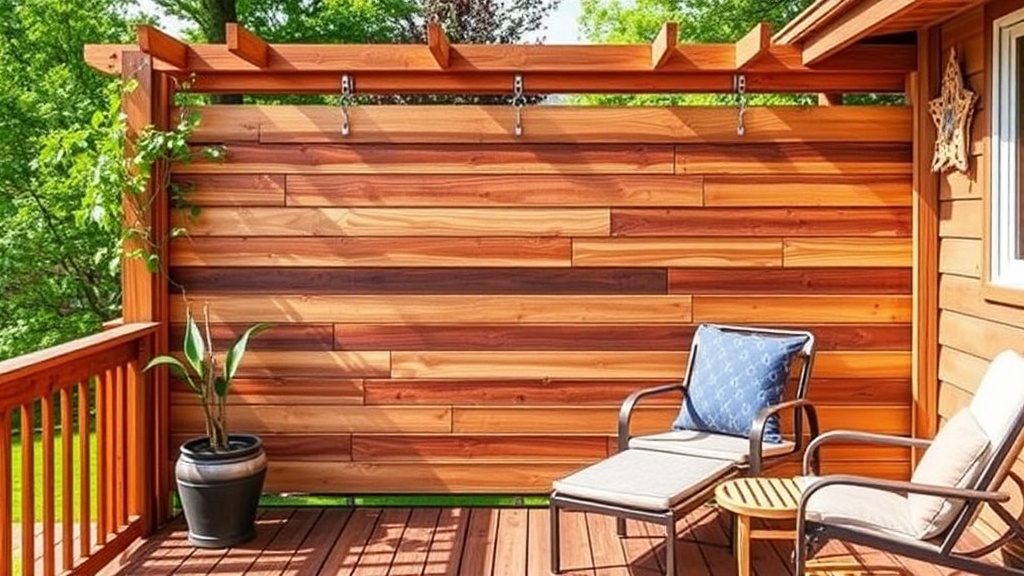
This guide walks you through building a sturdy cedar privacy screen that'll give your deck or patio real seclusion without looking like an afterthought. You'll learn how to select the right cedar boards, space them correctly for privacy while allowing airflow, build a frame that won't warp, and anchor everything securely so it stands up to wind and weather. Whether you're tired of your neighbor's view into your outdoor space or just want to create a cozy nook, this project takes a weekend and uses basic tools you probably already own.
Why Cedar Works Better Than Other Woods for Outdoor Screens
Cedar's your best bet for outdoor projects that sit in the elements year-round—and there's a reason contractors like me specify it for privacy screens, fences, and exterior trim. The wood contains natural oils that repel insects and resist rot, which means you're not stripping and re-staining every two years just to keep it from turning into mush.
Western red cedar is the variety you'll find at most lumberyards, and it's graded for appearance on one side. For a privacy screen, you want boards that are at least 5/4-inch thick (that's pronounced "five-quarter") rather than the standard 1-inch decking material. The extra thickness gives you more rigidity over an 8-foot span and holds fasteners better without splitting.
Here's what separates cedar from pressure-treated pine for this project: cedar moves less with humidity changes, it doesn't warp or twist as aggressively when the grain isn't perfectly straight, and it weathers to a silver-gray that's actually attractive if you decide to let it go natural. Pressure-treated lumber will check, crack, and splinter within a couple of seasons unless you stay religious about sealing it—and honestly, most homeowners don't.
What Materials and Tools You'll Actually Need
For an 8-foot-wide by 6-foot-tall privacy screen, grab six 5/4 x 6 x 8 cedar boards for the slats and two 2x4x8 cedar boards for the horizontal supports. The vertical posts are pressure-treated 4x4s—cedar 4x4s cost three times as much and don't offer any real benefit since they're buried in concrete below grade anyway.
You'll also need exterior-grade wood screws (2.5-inch and 3-inch), a tube of construction adhesive rated for exterior use, two 50-pound bags of concrete mix per post hole, and a spool of nylon string for layout. Optional but recommended: a post level (it's got two bubbles so you can check plumb on two sides at once) and a speed square for marking your cuts.
Tools are straightforward: circular saw or miter saw, cordless drill with a countersink bit, post hole digger or auger, level, tape measure, and a shovel. If you've got a table saw, you can rip one of your 2x4s into 2x2s for the horizontal supports and save a few bucks—otherwise just buy 2x2 cedar.
How Deep Should You Set the Posts for Stability?
This is where most DIY privacy screens fail—posts that wobble after the first winter because someone thought 18 inches of dirt would hold an 8-foot sail catching every gust of wind. Here's the rule I learned building hundreds of fence sections: bury one-third of your post length, minimum 24 inches in areas that don't see frost heave.
For a 6-foot-tall screen, use 8-foot 4x4s. That gives you 24 inches in the ground and 6 feet above, minus the thickness of your horizontal supports and the small gap at the bottom to keep the cedar from sitting in standing water. Dig your holes with a post hole digger (the clamshell kind) and make the bottom wider than the top—think of it as a little concrete mushroom that can't pull up through the soil.
Before you set a single post, stretch your string line to mark exactly where the screen will sit. Measure diagonally between your corner marks—if the measurements match, your layout is square. It's painful to set posts perfectly plumb only to realize they don't line up with your deck edge or property line.
What's the Right Spacing Between Slats for Privacy?
The gap between your cedar boards determines how much privacy you actually get versus how much airflow passes through. Nail this too tight and you've built a sail that'll catch wind and stress your posts; too loose and you're still making eye contact with the neighbor while you drink your morning coffee.
For true privacy from a seated position on a deck, space your 5.5-inch-wide cedar boards with a 1/4-inch gap between them. This gives you roughly 85% visual blockage when viewed straight on—enough that someone would need to actively try to see through rather than just glance over. If your screen runs parallel to a sight line (say, blocking the view from a neighbor's upper window), tighten that gap to 1/8 inch or butt the boards together knowing they'll shrink slightly as they dry.
Here's a trick from the field: cut a spacer block from scrap wood to whatever gap you're using. Hold it between boards as you fasten them, and your spacing stays consistent across the whole screen without measuring every single gap. Your eye catches variation instantly, so consistency matters more than the exact measurement.
Attach your horizontal 2x4 supports to the posts first, keeping them back from the post faces by about 3/4 inch so everything looks built-in rather than tacked on. Then fasten your cedar slats to these supports using exterior screws with a small countersink. Predrill everything—cedar splits easily near the ends, and there's no fixing a cracked board without replacing it.
Should You Stain or Seal the Cedar Right Away?
You've got three choices here, and they all work depending on what look you want. Option one: install the cedar raw and let it weather to that silver-gray over two seasons. No maintenance, but the wood will develop surface checking (small cracks) and the grain will raise slightly. Option two: apply a clear water-repellent sealer immediately after installation. This slows the weathering process and reduces checking while keeping the cedar's natural color for a year or two. Option three: use a semi-transparent stain with UV inhibitors—this gives you the most protection and lets you tint the cedar toward red, brown, or amber tones.
If you go with stain, wait until the cedar has had a few weeks to dry from the lumberyard. The surface should feel dry and the boards shouldn't feel cool or damp to the touch. Apply stain with a brush or sprayer, then back-brush to work it into the grain. One coat is plenty for vertical surfaces like a privacy screen—they don't take the beating that horizontal deck boards do.
Whatever you choose, don't paint cedar. Paint traps moisture, peels within a couple of years on vertical wood exposed to weather, and looks terrible when it starts flaking. I've torn out more painted cedar fences than I can count because someone thought a solid color would look "cleaner." It never does, not for long.
How Do You Anchor the Screen If You're Installing on a Deck?
Setting posts in the ground is straightforward—digging through a finished deck to pour footings is a different challenge. If your privacy screen sits on an existing deck, you have two solid options depending on your deck's framing.
Option one: surface-mount heavy-duty post bases to your deck framing using structural screws or through-bolts. You need to hit the deck's rim joist or blocking installed between joists—never rely on decking boards to hold a 6-foot lever catching wind. Simpson Strong-Tie makes post bases rated for this (the ABU66Z or similar), and they're designed to stand a 4x4 off the deck surface to prevent moisture contact. You'll need to remove some decking boards to install blocking between joists if your screen location doesn't line up with existing framing.
Option two: notch your 4x4 posts to sit over the deck's rim joist and run carriage bolts through the post and joist. This is stronger but requires more finish carpentry to conceal the bolts and blend everything together. Either way, don't skip the blocking—I've seen privacy screens rip deck boards right off their joists because someone thought three deck screws into 5/4 boards would hold.
Maintaining Your Privacy Screen for the Long Haul
Cedar's low-maintenance, not no-maintenance. Once a year, walk your screen and check for loose fasteners—wood expands and contracts, and screws can loosen over time. Tighten anything that's backing out and replace any that have snapped.
If you sealed or stained the cedar, plan on reapplication every 2-3 years. Vertical surfaces hold finish longer than horizontal, but the south-facing side will show UV degradation first. Touch up that side more frequently and you'll keep the whole screen looking consistent.
Keep vegetation trimmed back from the screen. Vines look charming growing up a trellis, but they trap moisture against the wood, hide decay until it's advanced, and provide highways for carpenter ants. Give your cedar breathing room and it'll return the favor with decades of service.