DIY Cedar Raised Garden Bed: Build It This Weekend for Under $100

Alright, so here’s the deal: if you’ve been thinking about a DIY cedar raised garden bed, early March is the right time to build it.
In Raleigh, the ground is usually workable now, but it’s still a little early for summer crops. Build the box this weekend, fill it, let it settle, and you’ll be ready to plant in April instead of panic-buying lumber when everyone else does.
I built my first set of four of these exact cedar beds in 2021 along my side yard. Same simple design, straight cuts only, and they’re still solid after five growing seasons.
If you’re also doing spring cleanup, pair this with my Spring Backyard Prep Checklist so you knock everything out in the right order.
Why Build a Cedar Raised Bed Instead of Pressure-Treated Lumber?
Cedar is a better pick for a veggie bed if you want rot resistance without using pressure-treated boards.
Pressure-treated lumber today is safer than old versions, but I still get why people don’t want it touching food beds. Cedar costs more up front, but it holds up well, looks better, and you don’t need fancy joinery to make it last.
This build is intentionally basic: no miters, no pocket holes, no weekend-killing complexity.
What Materials Do You Need for a Cedar Raised Bed?
You only need three main materials for the box itself, and this week’s pricing keeps you under $100 for lumber and fasteners.
- 2 x western red cedar boards, 2 in. x 6 in. x 8 ft (Home Depot Internet #202594096): $25.88 each = $51.76
- 1 x untreated framing post, 4 in. x 4 in. x 8 ft (#2 premium dimensional lumber, Home Depot Model# 769887140918): $14.33
- 1 lb exterior coated deck screws, #9 x 3 in. (Deckmate, Home Depot Model# 3DMR1): $10.97
Estimated total: $77.06 before tax
That leaves wiggle room for a fresh drill bit or a speed square if yours disappeared into the garage void.
Price check date: March 5, 2026. Lumber moves around a lot, so expect swings by region.
What Tools Do You Actually Need for This Build?
You can build this with common homeowner tools, and you do not need a miter saw.
- Circular saw
- Drill/driver
- 1/8 in. drill bit for pre-drilling
- Tape measure
- Speed square
- Clamps (helpful, not required)
- Level
If your drill is underpowered or inconsistent, check my Best Cordless Drills for Backyard Projects before you start. A decent drill makes this whole project smoother.
What’s the Cut List for a 2x4 Cedar Planter Box?
The cut list is short and all 90-degree cuts, which keeps waste low and mistakes easy to recover from.
From the two 2x6x8 cedar boards:
- Cut 2 pieces at 48 in. (long sides)
- Cut 2 pieces at 24 in. (short sides)
From the 4x4x8:
- Cut 4 pieces at 5-1/2 in. (inside corner posts for a single 2x6 course)
You’ll have offcuts left over. Save them for plant markers, a small trellis brace, or when you add a second course later.
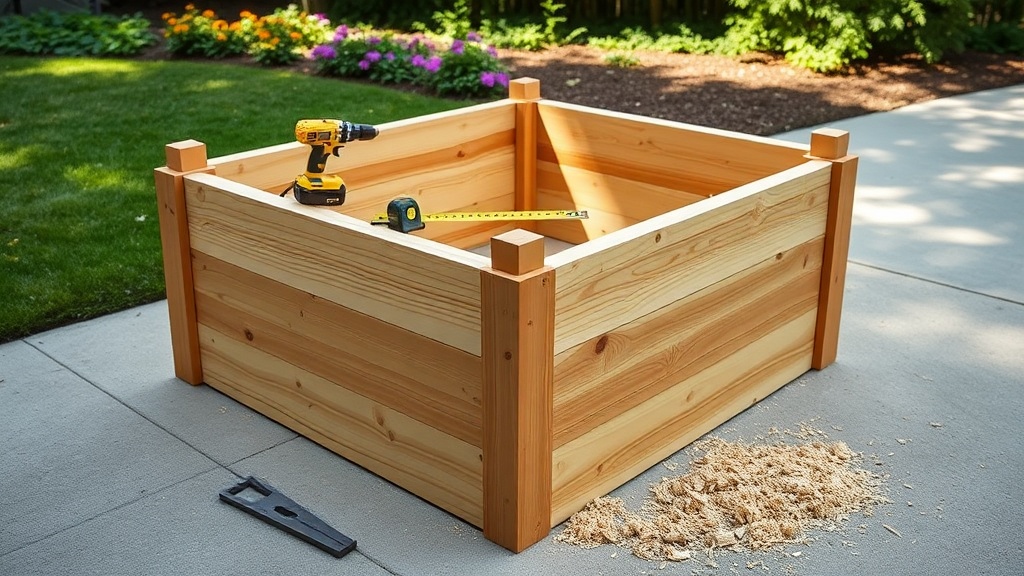
How Do You Assemble a Cedar Raised Garden Bed?
Build it flat, pre-drill everything, then square it before it ever touches soil.
Pick your spot first
Choose a level-ish area with at least 6+ hours of sun. Rake out roots and rocks so the bed sits flat.
Make your cuts
Mark every cut with a speed square so your lines stay true 90. Take your time here and your assembly goes way faster.
Pre-drill every screw location
Don’t skip this step. Seriously. Cedar splits near board ends if you run screws in cold. Pre-drill with a 1/8 in. bit first.
Build the first long side
Set one 48 in. board on edge. Clamp a 4x4 block inside the end so the top is flush with the cedar top. Drive 2 screws through cedar into the block.
Attach the opposite long side
Repeat with the second 48 in. board and two more corner blocks.
Add the 24 in. ends
Stand the frame up and screw the short boards into the exposed faces of the corner blocks. Use 2 screws per corner per board.
Square it on the driveway
Measure both diagonals corner-to-corner. Matching numbers = square. If they’re off, pull one corner and re-check.
Set it in place and level it
Move it to final location. Check level both directions and shim low spots with compacted soil.
If you’re doing more hardscape this spring too, this goes great with a DIY Fire Pit Build Guide for a full backyard weekend setup.
How Do You Fill a Raised Bed Without Wasting Money?
Bulk soil is almost always cheaper than bags once you’re filling more than one bed.
Here’s the math using this exact 2x4 bed at 5.5 in. tall:
- Home Depot Miracle-Gro Organic Raised Bed Soil: 1.5 cu. ft. = $9.97/bag
- One 2x4 bed at 5.5 in. high needs about 3.0 cu. ft.
- That’s about 2 bags = $19.94
Now compare local bulk options:
- City of Raleigh organic compost: $35 per cubic yard (about $1.30 per cu. ft.)
- Local Raleigh 50/50 topsoil-compost blend: around $49.95 per cubic yard (about $1.85 per cu. ft.)
For one bed, bagged soil is easy and still reasonable. For two or more beds, bulk usually wins. Example: my four-bed setup needs about 12.0 cu. ft.. That’s about 8 bags (~$79.76) at box-store pricing versus roughly $16-$22 of material in bulk before delivery. Even with a delivery fee, bulk is usually the better deal once you scale up.
What Mistakes Should You Avoid on Your First Bed?
Most first-bed problems come from rushing the boring setup steps.
- Skipping pre-drill and splitting cedar
- Building on uneven ground and ending up with a twisted box
- Using interior screws that rust out
- Making the bed too wide to reach (keep width at 4 ft max)
Personal fail, ask me how I know: on my first one years ago, I thought I could “eyeball square” and start filling dirt. After a heavy rain, one corner settled, the frame racked, and I had to unload half the soil and rebuild that corner. Ten extra minutes with diagonal measurements would’ve saved two hours of rework.
How Long Will a Cedar Raised Garden Bed Last?
Built like this, a cedar bed usually lasts 10-15 years easy, and mine are on year five and still going strong.
To keep yours in that range:
- Top-dress with 1-2 in. compost each spring
- Check and snug screws once a season
- Keep mulch and wet soil from staying piled above the top edge all year
- Don’t trap water against one side (grade around it if needed)
What Are the Most Common Questions About Cedar Raised Beds?
These are the quick answers homeowners ask me most before they build.
Is cedar safe for vegetable gardens?
Yes. Cedar is naturally rot resistant and commonly used for food gardens without chemical treatment.
Do I need to line a cedar raised bed?
Usually no for veggies. If you want cleaner edges and slower soil loss through gaps, staple landscape fabric to the inside walls only.
What size raised bed is best for beginners?
A 2x4 or 4x4 bed is the easiest start. You can reach everything without stepping in the soil, and fill cost stays manageable.
How deep should a raised bed be for vegetables?
For greens and herbs, 6-8 inches works. For bigger root crops and more flexibility, aim for 10-12 inches by stacking a second course later.
Can I put a raised bed directly on grass?
Yes, but remove thick turf first and level the footprint. Cardboard under the bed helps suppress grass while it breaks down.
You can do this. Seriously. One morning, one trip to the lumber yard, and you’re set for spring planting. If you build one this weekend, I want to see it.