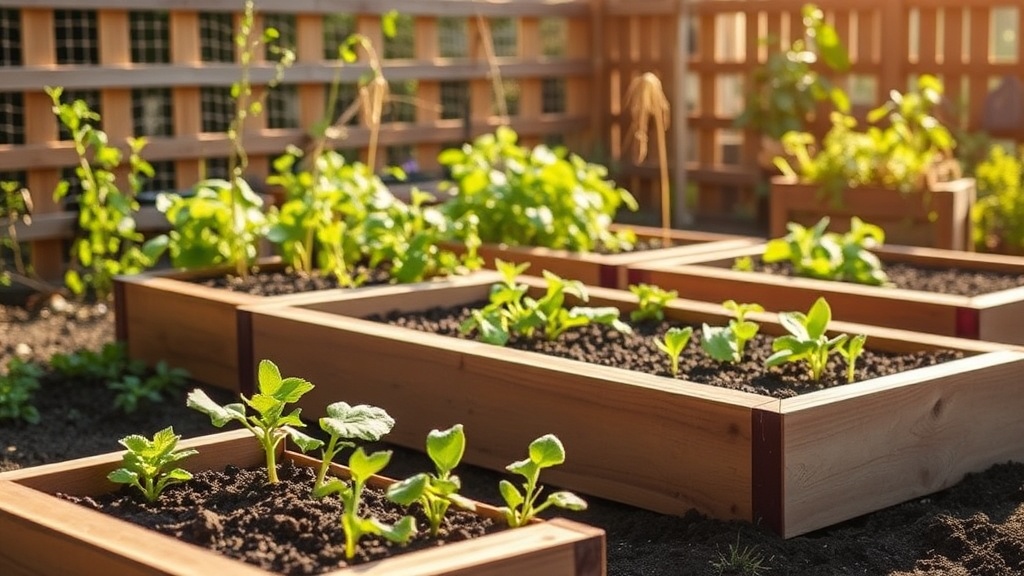
How to Build a Simple Raised Bed Garden

This guide provides a step-by-step walkthrough for constructing a durable, 4x8-foot wooden raised garden bed using standard dimensional lumber. You will learn how to select the right materials, prepare your ground site, assemble the frame, and fill the bed with high-quality growing medium to ensure your vegetables have the best possible environment.
Selecting Your Materials
The biggest mistake I see DIYers make is buying cheap, untreated wood that rots after just two seasons. When you are building something that sits in wet soil, you need to prioritize longevity. For a standard raised bed, I recommend using 2x12 lumber. This provides enough depth for deep-rooting vegetables like carrots or tomatoes while remaining structurally stable.
Wood Type Options
- Cedar: This is the gold standard for raised beds. Western Red Cedar contains natural oils that resist rot and insect damage. It is more expensive upfront, but it will last significantly longer than pine.
- Redwood: Similar to cedar, redwood is highly durable and aesthetically pleasing, though it can be harder to source depending on your location.
- Pressure-Treated Lumber: If you are on a tight budget, you can use pressure-treated pine. However, ensure you look for modern ACQ (Alkyl Phenol Quinoline Quaternary) treated wood, which is much safer for vegetable gardening than the old arsenic-based treatments used decades ago.
Required Tools and Hardware
Before you head to the hardware store, make sure you have the following items on your workbench. You won't need heavy machinery, just basic construction tools.
- Circular Saw: For cutting your lumber to length.
- Power Drill/Driver: To drive your screws.
- Tape Measure: Accuracy is key to ensuring your corners are square.
- Speed Square: To check your angles during assembly.
- Level: To ensure the bed sits flat on the ground.
- 3-inch Exterior Wood Screws: Specifically, look for "Deck Screws" or "Structural Screws." They are coated to prevent rusting and are much stronger than standard drywall screws.
Site Preparation and Placement
Where you place your garden bed is just as important as how you build it. A beautiful raised bed is useless if it is sitting in the shade or in a low spot where water collects.
Sunlight and Drainage
Most vegetables, especially fruiting crops like peppers and cucumbers, require at least 6 to 8 hours of direct sunlight daily. Map out your yard and look for the "sun path" throughout the day. Additionally, avoid placing the bed in a depression in your lawn. If the area stays soggy after a heavy rain, you will struggle with drainage issues regardless of how much soil you use.
Leveling the Ground
A common error is placing a wooden frame directly onto uneven grass. Over time, one side will sink, causing the soil to spill out and the frame to warp. I suggest clearing a 4x8-foot area of grass or weeds. You can use a shovel to scrape away the sod, or if you want to keep the grass intact, lay down a thick layer of corrugated cardboard over the area before you set the bed down. This cardboard will eventually decompose and allow worms to enter the bed while suppressing weeds.
If you want to maximize your growing area, you might also consider thriving container gardens alongside your raised beds to add vertical interest and more planting options.
Assembly Instructions
For this project, we are building a frame that is 4 feet wide and 8 feet long. This size is ideal because it allows you to reach the center of the bed from either side without stepping into the soil, which prevents compaction.
Step 1: Cutting the Lumber
You will need four boards in total. To create a 4x8 bed that is roughly 11 inches deep, cut your lumber as follows:
- Two boards at 96 inches (8 feet) for the long sides.
- Two boards at 45 inches for the short ends. (Note: We use 45 inches instead of 48 because the 45-inch board will sit inside the 1.5-inch thickness of the long boards on both sides, totaling 48 inches).
Step 2: Pre-Drilling Pilot Holes
Never drive a large screw into the end of a board without drilling a pilot hole first. If you don't, the wood will almost certainly split, especially near the edges. Use a drill bit that is slightly smaller than the shank of your screw. This ensures the wood stays intact while providing maximum grip for the screw.
Step 3: Assembling the Frame
Lay your boards out on a flat surface, like a driveway or a cleared patch of grass. Place the 45-inch end boards inside the 96-inch side boards. Use your speed square to ensure the corners are at a perfect 90-degree angle. Drive three 3-inch exterior screws through the face of the long board into the end of the short board. Repeat this for all four corners. Once the frame is assembled, stand it up in its permanent location.
Step 4: Reinforcing the Corners
If you want a professional-grade build, I recommend adding a 4x4 post in each corner. Cut a 12-inch section of a 4x4 post and place it in each interior corner of the frame. Screw through the 2x12 boards into the 4x4 post. This provides much more structural integrity and prevents the corners from "bowing" outward once you fill them with heavy, wet soil.
Lining and Filling the Bed
Once the frame is standing and level, it is time to prepare the interior for planting. You shouldn't just fill this with dirt from your backyard, as most yard soil is too dense and lacks the nutrients required for high-yield gardening.
Preventing Soil Loss
To prevent your expensive soil from washing out through the cracks, line the inside of the wooden walls with heavy-duty landscape fabric or a fine nylon mesh. Do not use plastic sheeting on the bottom of the bed; you need the bed to "breathe" and allow water to drain into the ground. If you use plastic, you risk creating a stagnant, anaerobic environment that will kill your plants' roots.
The Ideal Soil Mix
I recommend a "three-way mix" for raised beds. This is a blend of topsoil, compost, and peat moss (or coconut coir). A standard ratio is:
- 40% High-Quality Topsoil: Provides the base and mineral content.
- 40% Compost: Provides the organic matter and nutrients. Use well-rotted manure or finished compost from a supplier.
- 20% Aeration Material: Use perlite, vermiculite, or coarse sand. This ensures the soil remains fluffy and doesn't compact over time.
Fill the bed until the soil level is about 2 inches below the top edge of the wood. This "lip" prevents water and soil from overflowing during heavy rain or when you are using a garden hose.
Maintenance and Longevity Tips
To keep your raised bed in top shape, perform a few simple checks throughout the season. Every spring, add a two-inch layer of fresh compost to the top of your bed. This "top-dressing" replenishes the nutrients that the previous year's plants consumed.
If you notice the wood beginning to weather or turn gray, you can apply a food-safe wood sealer to the exterior. Just ensure the product is labeled as safe for vegetable gardens. Regular maintenance ensures your garden remains a productive part of your backyard for years to come. If you are looking to expand your outdoor living space beyond the garden, consider adding a fire pit to your backyard to create a complete outdoor entertainment area.
Steps
- 1
Select your location and materials
- 2
Assemble the wooden frame
- 3
Line the bottom with cardboard
- 4
Fill with high-quality soil mix