How to Build a Stone Fire Pit That Actually Lasts

Alright, so here’s the deal with backyard fire pits.
A lot of the ones you see online look great for about six months… and then they start leaning, cracking, or sinking into the lawn.
That usually happens because the base prep was rushed.
A fire pit is basically a small masonry structure sitting in dirt. If the ground isn’t stable underneath, the whole thing slowly shifts.
The good news is you don’t need to be a mason to build one that lasts. You just need the right base and the right materials.
I’ve built a bunch of these over the years — both for clients and in my own yard — and the process is pretty straightforward if you take your time.
Let me walk you through it.
Step 1: Pick the Right Location
Before you dig anything, take a minute to choose a smart spot.
Look for an area that is:
• At least 10–15 feet away from structures
• Not directly under tree branches
• On relatively flat ground
• Downwind from the house if possible
If your yard slopes, pick the highest reasonably level spot. Fire pits on slopes tend to shift over time.
A 12–16 foot seating circle around the pit works well for chairs.
Step 2: Decide on Size
Most backyard fire pits land somewhere between 36 and 44 inches in diameter.
That’s big enough for a real fire but still easy for people to sit around.
Typical measurements:
• Inner diameter: 30–32 inches
• Outer diameter: 40–44 inches
• Height: 12–16 inches
Three rows of stone blocks usually lands you right in that range.
Step 3: Gather Materials
Here’s a typical materials list for a standard backyard pit.
Fire pit blocks
Retaining wall blocks or fire pit stones from Home Depot or Lowe’s.
Expect about:
• $3–$6 per block
• Around 36–48 blocks total
Paver base gravel
This creates the foundation.
• About 4–6 bags or ½ cubic yard
Paver sand
Used for leveling the stones.
• 2–3 bags
Fire pit ring (optional but recommended)
Steel insert protects the stones from extreme heat.
• Usually $40–$80
Construction adhesive
Landscape block adhesive for securing the top rows.
• About $8–$10 per tube
Step 4: Mark the Fire Pit Circle
Use a stake and a string to mark the circle.
Here’s the easy trick:
- Drive a stake into the center.
- Tie a string to it.
- Measure half your pit’s diameter.
- Walk the circle with spray paint.
This gives you a perfectly round outline to dig.
Step 5: Dig the Base
Now you’re digging.
Remove grass and soil inside the circle about 6–8 inches deep.
It feels like overkill when you’re doing it.
But this is the step that keeps the pit from sinking later.
Once the soil is out, rake the area flat and compact it with a hand tamper.
Step 6: Install the Gravel Base
Add 4–5 inches of paver base gravel.
Spread it evenly and compact it in layers.
This is another spot where patience pays off.
Compact the gravel thoroughly so it becomes a solid base.
Once compacted, it should feel almost like concrete under your feet.
Step 7: Add a Sand Leveling Layer
Next comes about 1 inch of paver sand.
This layer helps you fine-tune the level of the first row of blocks.
Use a straight board or level to smooth the sand.
The goal is a flat, even surface.
Step 8: Lay the First Row of Blocks
This is the most important row in the whole project.
Place your first ring of blocks directly on the sand.
Check each block with a level.
If one sits high or low, adjust the sand underneath until it’s perfectly level.
Take your time here.
If the first row is level, the rest of the pit will go together easily.
Step 9: Stack Additional Rows
Once the base row is set, the rest is simple stacking.
Offset the seams of each row like brickwork.
This improves strength and stability.
Typical fire pits use two or three rows of blocks.
For the top row, run a bead of construction adhesive between blocks to lock everything together.
Step 10: Install the Fire Ring
If you’re using a steel fire ring, drop it inside the pit now.
The ring protects the blocks from the most intense heat.
Without one, cheaper stones can eventually crack.
Leave about 1–2 inches of gap between the ring and the stones for airflow.
Step 11: Backfill Around the Pit
Once the structure is done, backfill around the outside with soil or gravel.
This locks the pit in place and improves drainage.
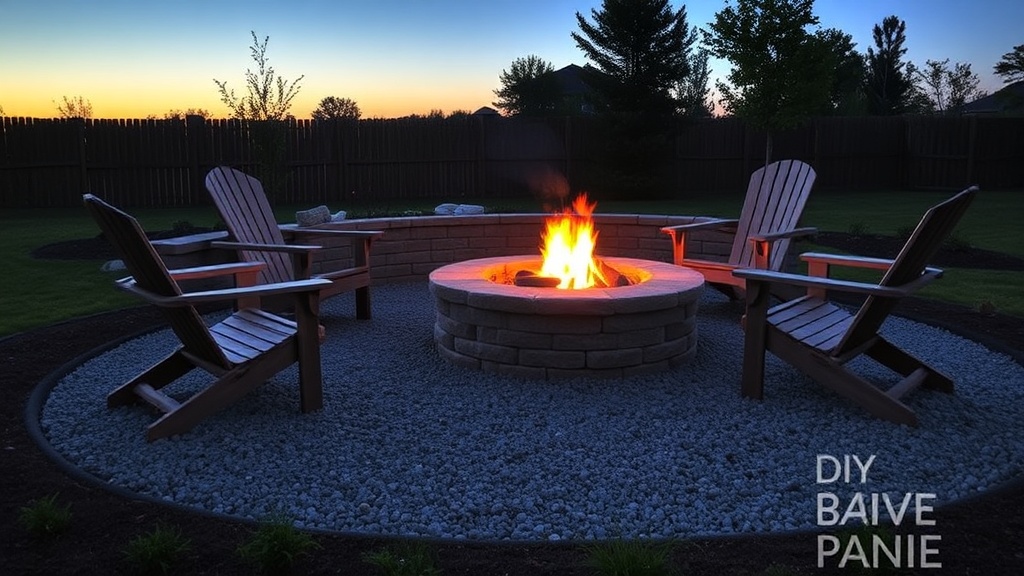
If you want a clean look, surround the pit with:
• pea gravel
• pavers
• crushed stone
That creates a nice seating area and keeps mud away from the fire zone.
Step 12: Add Seating
The pit is only half the project.
Comfortable seating turns it into a real gathering space.
A few good options:
• Adirondack chairs
• built-in stone benches
• outdoor couches
• simple log stools
Aim for 6–8 seats around the circle.
That’s the sweet spot for most backyard fires.
Mistakes to Avoid
These are the big ones I see all the time.
Skipping the gravel base
The pit will sink. Guaranteed.
Building directly on grass
Grass decomposes and leaves gaps underneath.
Using regular bricks
Standard bricks often crack under repeated heat.
Always use fire-rated materials or retaining wall blocks.
My Backyard Fire Pit Experience
The fire pit in our yard is easily the most used feature outside.
Cool fall evenings, random summer nights, neighbors stopping by — it becomes the natural gathering spot.
The funny thing is it took one afternoon to build and maybe a few hundred dollars in materials.
But it completely changed how we use the backyard.
The Bottom Line
A backyard fire pit doesn’t need to be complicated.
If you build a solid gravel base, level the first row of stones carefully, and use decent materials, it’ll last for years.
Most of the work is in the digging and base prep.
Once that part is done, the rest goes together pretty quickly.
And once the first fire is going and people are sitting around it?
Totally worth the effort.