How to Build a Backyard Putting Green (DIY Guide)

Alright, I’ll admit this one started as a bit of a "fun project" that got slightly out of control.
A few years ago I decided I wanted a place to practice putting without driving to the golf course. I figured a small green in the backyard would be a cool addition.
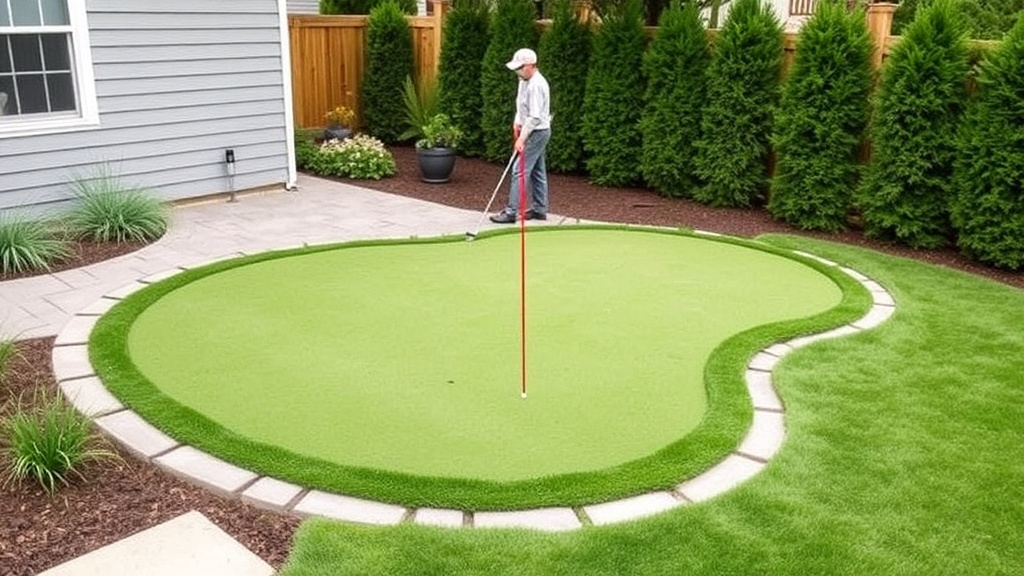
Fast forward one weekend and I had a 12×20 foot putting green behind the patio. And honestly? It’s probably my favorite thing I’ve ever built in the yard.
The good news is building a small backyard putting green is completely doable as a DIY project if you’re willing to do some digging and leveling.
Here’s the process I used.
Step 1: Plan Your Putting Green

Start by measuring the space you have available.
A good beginner size is around 10×15 feet. Big enough to practice real putts but small enough to build in a weekend.
When planning the space, look for:
• relatively flat ground
• good drainage
• an area that gets moderate sun
You can add gentle slopes if you want more challenge, but keep the first build simple.
Step 2: Choose Your Surface
There are two main options for backyard putting greens.
Natural Grass (Bentgrass)
This is the same grass type used on real golf courses.
Pros:
• authentic putting feel
• natural look
Cons:
• high maintenance
• requires irrigation and mowing
Synthetic Turf (Recommended)
Most homeowners choose synthetic turf because it's far easier to maintain.
Two good suppliers include:
Another good resource for turf comparisons is:
Synthetic turf looks great and requires almost no maintenance.
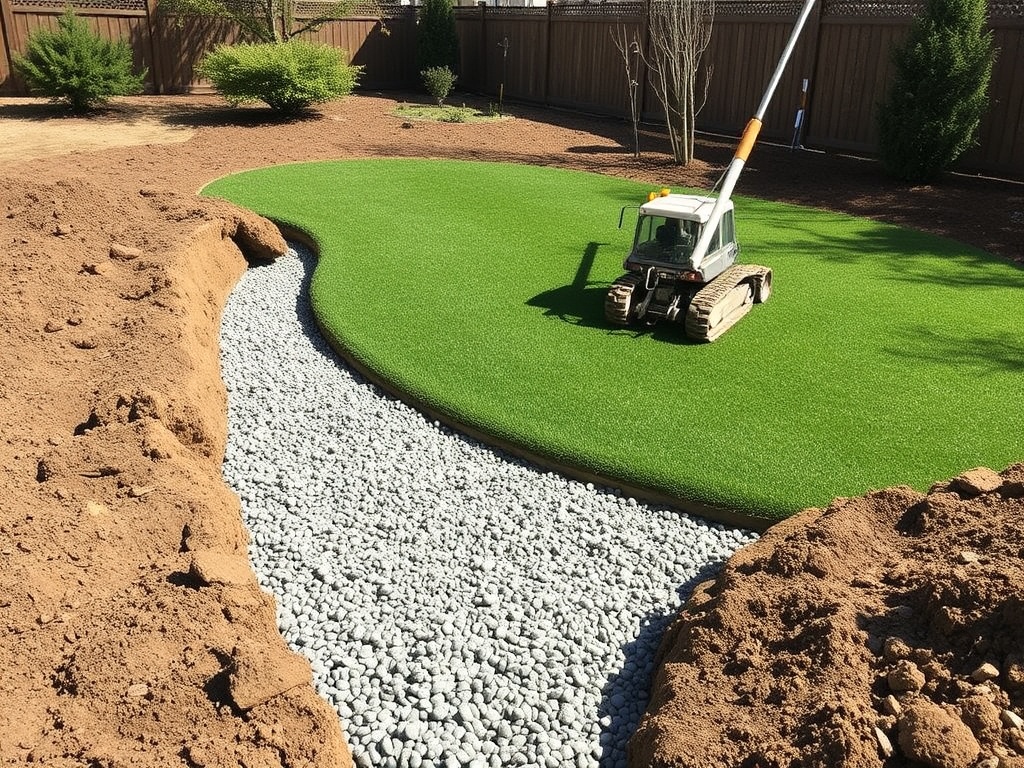
Step 3: Excavation and Base Prep
This is the most important step.
Excavate the area about 3–4 inches deep.
Then fill it with a compacted base layer using:
• crushed limestone
• decomposed granite
Both materials are available at most local landscape supply yards.
Compact the base with a hand tamper or plate compactor until it's firm and level.
Step 4: Install Drainage
Drainage keeps the green from holding water after rain.
Usually the compacted gravel base handles most drainage, but in wet areas you can add a small drain pipe or gravel trench along one edge.
A slight slope also helps water run off naturally.
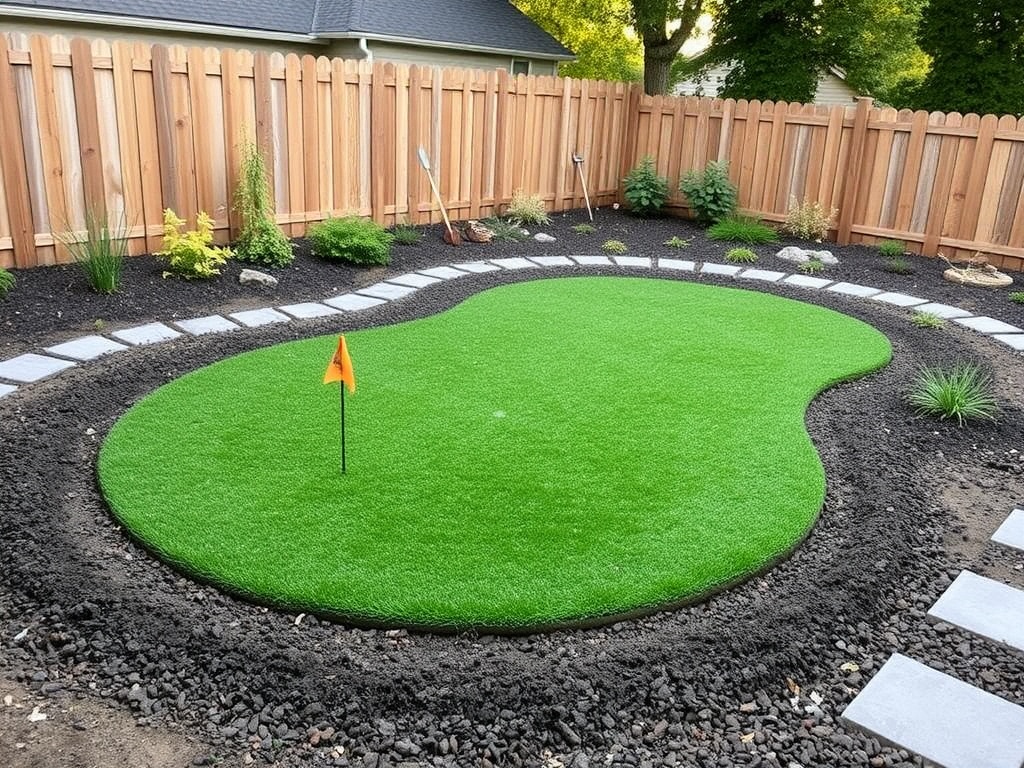
Step 5: Lay the Turf
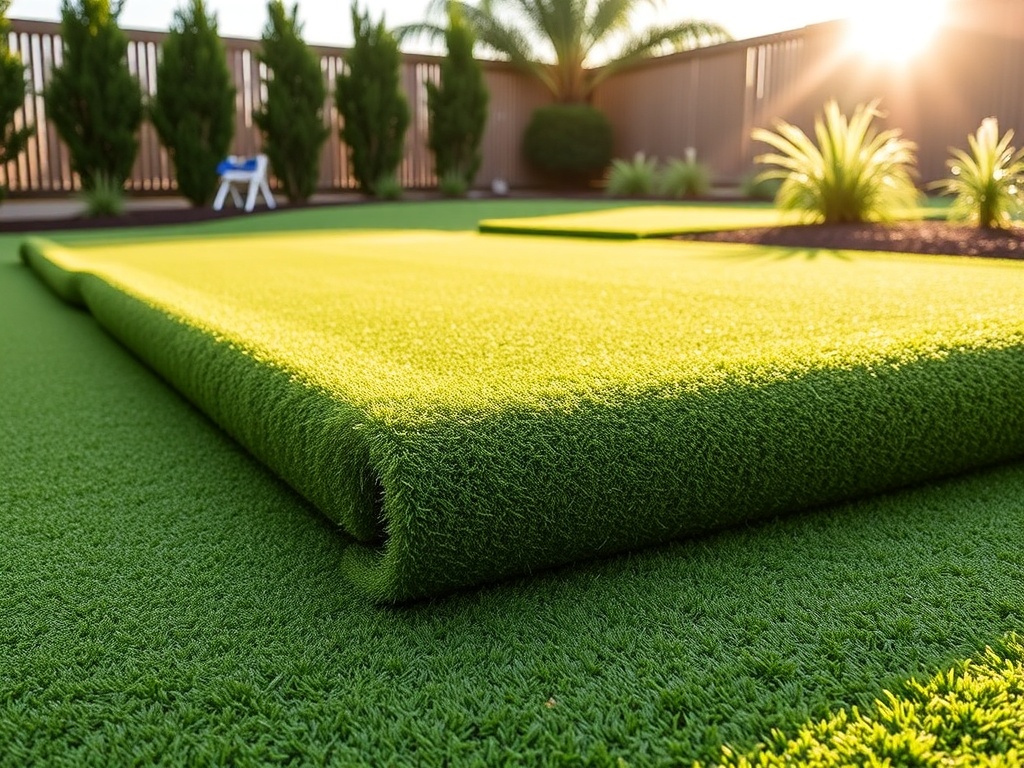
Roll the turf over the compacted base and trim the edges with a utility knife.
Secure it using:
• landscape staples
• adhesive seam tape (if using multiple turf sections)
Smooth everything carefully so there are no wrinkles.
Step 6: Install the Cup and Flag
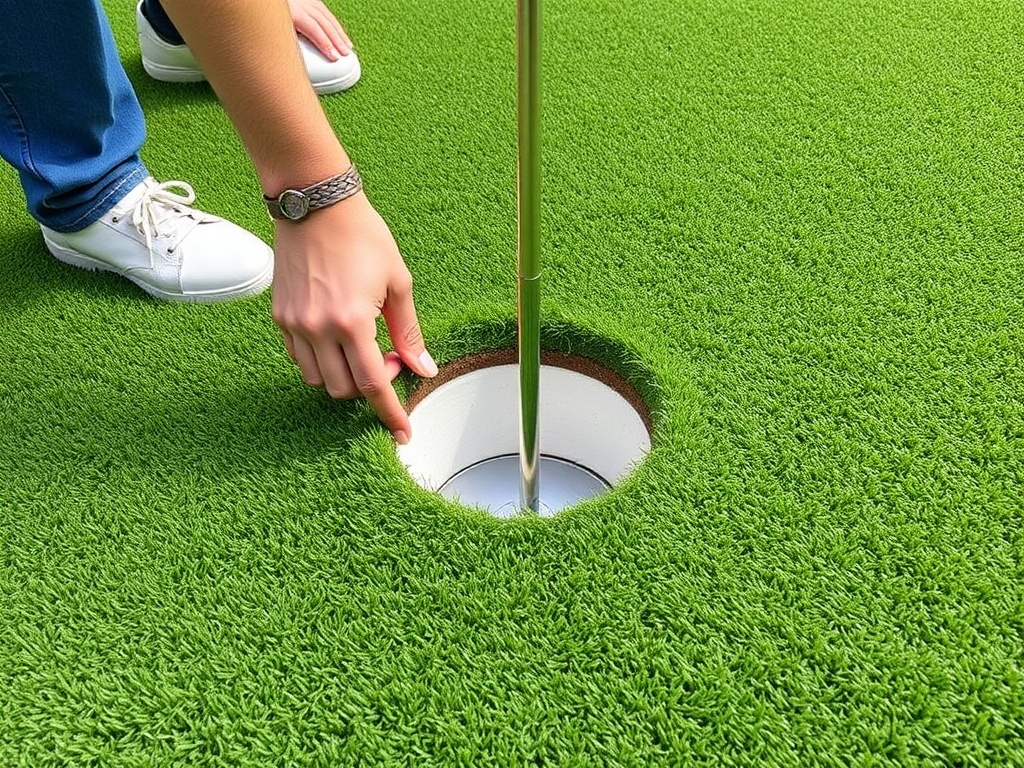
Cut a small hole where you want the cup.
Two simple options I like:
• GoSports flagstick set (~$30 on Amazon)
• PrideSports practice putting cup (~$10)
Drop the cup into place and you're ready to putt.
Materials and Budget
Here’s roughly what a small DIY putting green costs.
• Synthetic turf: $200–$600
• Base gravel or DG: $100–$200
• Cup and flag kit: $10–$30
• Misc tools and supplies: $100
Total DIY cost for a 10×15 green:
$500–$1,500 depending on materials.
Professional installation often runs $5,000–$15,000, so DIY can save a lot.
Maintenance Tips
Synthetic greens are surprisingly low maintenance.
A few simple habits keep them looking good.
• Brush the turf monthly
• Use a leaf blower to remove debris
• Occasionally rinse dust or dirt away
That’s about it.
Final Thoughts
Building that putting green ended up being one of the best backyard projects I’ve ever tackled.
It’s fun, it’s unique, and it gives you an excuse to step outside and roll a few putts whenever you want.
And honestly, backyard projects that actually get used every week are the best kind.