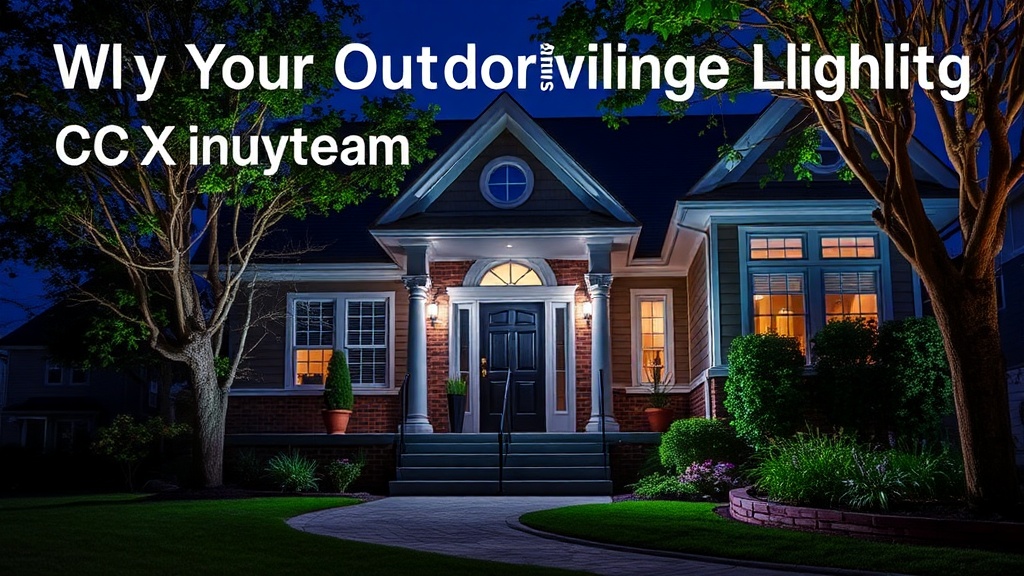
Why Your Outdoor Lighting Changes Everything

Imagine walking out onto your back deck at 8:00 PM. Without any lighting, you are stepping into a dark void where the edge of your stairs is a tripping hazard and the beautiful stone patio you worked hard to install is invisible. Now, imagine that same scene, but with soft, warm light grazing the texture of the stone, a few subtle spotlights highlighting the canopy of your Japanese Maple, and a glow emanating from your outdoor kitchen. This post covers why professional-grade outdoor lighting is the most effective way to extend your living space, increase your home's value, and ensure your backyard remains functional and safe after the sun goes down.
The Three Main Functions of Outdoor Lighting
When people talk to me about lighting, they usually think about one of two things: seeing where they are walking or making things look "pretty." While those are important, a professional lighting plan actually serves three distinct purposes: safety, security, and aesthetics. If you only focus on one, you'll end up with a backyard that is either too bright (looking like a parking lot) or too dark (feeling unsafe).
Safety and Navigation
Safety is the foundation of any outdoor build. If I am building a multi-level deck for a client, the first thing we discuss is the lighting for the stair treads. You shouldn't have a bright floodlight pointed directly at people's eyes, but you do need enough light to distinguish the edge of a step from the ground. Low-voltage path lights or recessed LED step lights are the standard here. These lights provide enough illumination to prevent trips and falls without creating glare that ruins your night vision.
Security and Perimeter Defense
A well-lit perimeter acts as a psychological deterrent. However, there is a big difference between "security lighting" and "nuisance lighting." High-intensity motion sensors that blast light into your neighbor's bedroom window are a nuisance. Instead, use strategically placed uplights or perimeter lighting that illuminates the boundaries of your property. This makes the area visible to you and your security cameras without creating unnecessary light pollution.
Aesthetic Depth and Ambiance
This is where the magic happens. Lighting adds "depth" to a landscape. Without it, your backyard looks like a flat black wall once the sun sets. By using different layers of light, you create a sense of space. For example, lighting a large tree or a stone retaining wall adds a sense of scale and makes the yard feel much larger than it actually is.
The Different Layers of Lighting Design
To get a professional look, you cannot just scatter a dozen solar-powered stakes from a big-box store across your lawn. You need to layer your light. I tell my clients to think about lighting in four specific categories: task, ambient, accent, and wayfinding.
1. Task Lighting: Functionality First
Task lighting is used for specific activities. If you have an outdoor kitchen or a grill station, you need dedicated task lighting. A simple overhead pendant or a recessed light under a kitchen cabinet is essential. You cannot cook a steak if you are squinting to see the thermometer. Similarly, if you have a dining area, a low-hanging light fixture over the table provides the necessary light for eating and conversation without being overwhelming.
2. Ambient Lighting: The General Glow
Ambient lighting provides the overall illumination for an area. This is often achieved through string lights, also known as bistro lights. If you have a pergola or a patio cover, hanging heavy-duty, commercial-grade Edison bulbs can create a warm, inviting atmosphere. These are great for general area illumination, but they shouldn't be your only light source, or the space will feel flat.
3. Accent Lighting: Highlighting Features
Accent lighting is used to draw the eye to specific objects. This is where you use "uplighting" or "spotlighting." If you have a beautiful specimen tree, like a Dogwood or a Magnolia, place a well-shielded spotlight at the base of the trunk and aim it upward. This creates dramatic shadows and adds texture to your landscape. You can also use accent lighting to highlight architectural features like a stone chimney or a water feature.
4. Wayfinding Lighting: Path and Step Safety
Wayfinding lighting is all about movement. This includes path lights that line your walkway and step lights that illuminate stairs. When installing path lights, avoid placing them directly in the middle of the path where they might blind someone walking toward them. Instead, place them slightly off to the side or use "grazing" techniques to light the path from the side. This ensures the ground is visible without the light source being an obstacle.
Choosing the Right Hardware and Technology
The biggest mistake DIYers make is buying cheap, solar-powered plastic lights. While they are fine for a temporary garden bed, they won't last more than one season and they lack the brightness needed for real security or ambiance. If you want a system that lasts, you need to invest in a low-voltage hardwired system.
Low-Voltage vs. Line-Voltage
For most residential backyard projects, I recommend a 12-volt low-voltage system. It is much safer for DIY installation because you don't have to worry about the same level of electrical shock as a 120-volt line-voltage system. You will need a transformer that plugs into a standard outdoor outlet, which then powers a series of lights connected by low-voltage landscape wire. This system is easy to expand and much more reliable than solar options.
LED vs. Halogen
LED is the only way to go today. LED bulbs use significantly less energy, run much cooler (which is important when lighting near plants), and have a much longer lifespan. When buying LED fixtures, pay attention to the "Color Temperature" measured in Kelvin (K). For a cozy, residential feel, look for "Warm White" between 2700K and 3000K. If you want a more modern, crisp look, you might go up to 4000K, but anything higher than that starts to look like a commercial parking lot or a hospital.
Material Quality
Since these fixtures will be sitting in dirt, rain, and snow, material matters. Look for solid brass or heavy-duty aluminum housings. Avoid anything made of thin plastic. If you are installing lights near a garden or a raised bed, ensure the fixtures are rated for outdoor use and have a high IP (Ingress Protection) rating to keep moisture out of the circuitry.
Common Mistakes to Avoid
I see these mistakes on almost every job site where a homeowner tries to do it themselves without a plan. Avoid these pitfalls to ensure your project looks professional.
- Over-lighting: The most common mistake is having too much light. If every inch of your yard is bright, you lose the shadows that create depth. A well-lit yard should have a balance of light and shadow.
- Glare: If you can see the actual light bulb from your seating area, the light is poorly placed. You want to see the effect of the light, not the source. Use shields, recessed housings, or aim the light away from eyes.
- Ignoring the "Dark Spots": If you light your trees but leave your walkways pitch black, you have a safety hazard. Ensure there is a continuous flow of light that guides a person through the space.
- Using Cheap Solar Stakes: As mentioned before, solar stakes are often inconsistent. They might be bright at 7:00 PM but dead by 9:00 PM. They also tend to look "cheap" because they lack the weight and build quality of a real fixture.
Practical Implementation Tips
Before you go out and buy a bunch of lights, grab a piece of graph paper or use a satellite view of your yard on your phone. Map out your "zones." Identify your "anchor points"—these are your big features like trees, statues, or stone walls. Then, identify your "movement paths"—your stairs, walkways, and patio edges.
Start your installation with the most important functional lights first (the stairs and the grill) and then work your way toward the decorative lights. This ensures that if you run out of budget or time, you at least have a safe and functional yard. If you are working on a smaller patio, consider how lighting can complement your existing furniture. For instance, if you have a small space, you might want to use an outdoor rug to define the space, and then use low-profile path lights to frame the perimeter of that rug. This creates a cohesive, "outdoor room" feel.
Finally, always test your lighting at night before you permanently bury the wires or secure the fixtures. Light behaves differently in the dark than it does in the afternoon sun. A light that looks perfect at 4:00 PM might be blindingly bright at 9:00 PM. Adjust your angles and intensities until the balance feels right.