Wood-Fired Pizza Oven: The $1,500 Setup That Actually Makes Pizza Worth Building

Let me be straight with you: I've built outdoor kitchens for clients and for myself. I've helped neighbors spec pizza ovens they found on YouTube. I've watched $2,000 setups collect cobwebs after six months because nobody told the homeowner what they were actually getting into.
So here's the honest version.
The Math People Skip
Before you buy anything, run this calculation.
A wood-fired pizza oven setup runs $800 to $3,500+ depending on what you choose. Add a proper base or stand (if it doesn't come with one), a wood storage solution, a peel, an infrared thermometer, and your first cord of pizza wood—you're realistically looking at $1,200 to $2,000 all-in on the budget end. More if you go brick dome.
Now: how often will you use it?
Be honest. In my experience—and from talking to clients who've had outdoor cookers for years—a backyard grill gets fired up regularly through the spring and summer. A pizza oven? From what I've seen and heard from owners, most people settle into somewhere between 10 and 20 uses a year after the novelty wears off. Let's say you're committed and you hit 20 nights.
At $1,500 upfront and 20 uses a year over 5 years, that's $15 per pizza night before you buy ingredients. If you're feeding a family of five with a few pies, you're looking at roughly $5–8 in ingredients per pizza night depending on what you top them with. Call it $20–23 total per session.
Compare that to delivery: in most markets, specialty pies run $18–25 each, and a family needs two or three. Check your local prices—delivery math varies a lot by city—but in most places the pizza oven wins on cost per family night once you're using it regularly.
The ROI actually works—if you use it. The problem isn't the money. It's the commitment.
The people who get the most out of their pizza ovens treat Friday night pizza like a ritual. Kids get involved. It becomes the thing. If you're buying it to impress guests twice a year, save the cash and call Domino's. Before you commit to a purchase, plan your backyard layout strategically—placement and timing matter.
Oven Types by the Numbers
Traditional Brick Dome
The gold standard. A proper brick dome oven—refractory bricks, firebrick floor, clay mortar, insulation dome—holds heat for 4–6 hours once you fire it up. You can bake pizza at 800–900°F, then drop to 600°F for bread, then 400°F for roasting as it cools through the evening.
Build time: If you're DIYing, budget a weekend per stage—foundation, dome form, brick work, curing fires. Four to six weekends total if you're doing it right. Rush the curing fires and you'll get cracks.
Cost: Materials vary a lot by region. A 36-inch dome can run anywhere from $1,200 to $2,500+ for materials alone depending on local brick prices, whether you're pouring your own base, and how you finish the exterior. Get local quotes before you commit to a number.
Cleaning: Ash removal every few uses. The dome self-cleans at high temps. Not bad once you're in a rhythm.
What people don't expect: The preheat. A brick dome takes 60–90 minutes to reach pizza temps. This is not a Tuesday night impulse. You plan it.
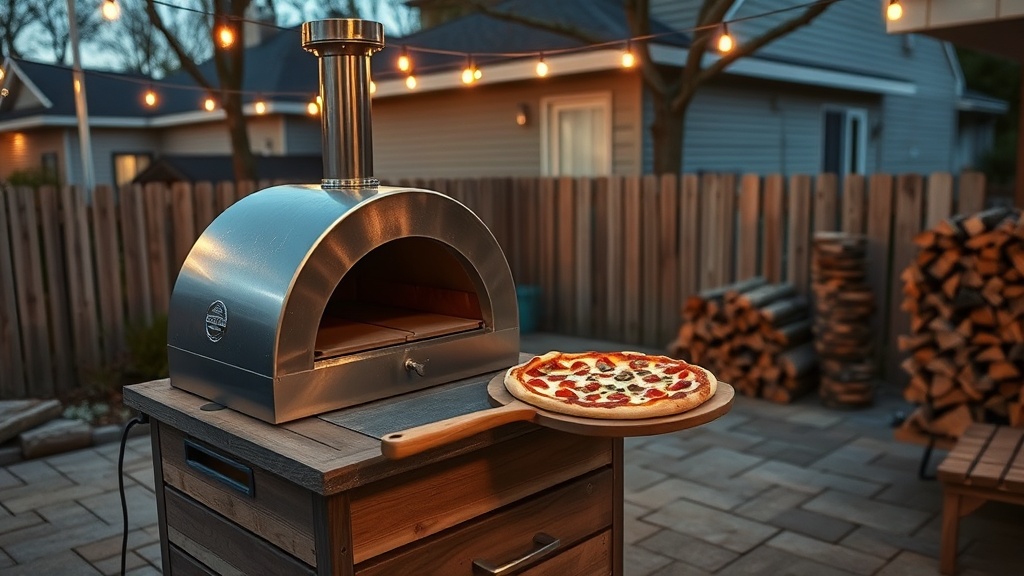
Portable Steel Ovens (Ooni, Gozney, etc.)
This is where most suburban buyers land, and honestly, for good reason. Steel ovens like the Ooni Karu 2 Pro can reach pizza temps in around 15–20 minutes on wood or charcoal. That's the real selling point.
Now, important clarification: not all portable steel ovens heat equally fast. Larger units like the Gozney Dome take 40–50 minutes to fully saturate the stone before you're baking Neapolitan. Check your specific model's documentation before you plan your pizza night around a 15-minute preheat—it doesn't apply across the board.
The catch on steel: The floor cools faster than brick when you load multiple pies back-to-back. For family pizza nights with 4–6 pies in a row, you'll notice crust inconsistency on pies 4 and 5 while the floor recovers. Brick doesn't have this problem.
Cost: Quality units run $500–$1,000. Add a stand, cover, peel set, and infrared thermometer, and your all-in number climbs. Check current manufacturer pricing—this category moves fast.
Footprint: Small. Portable. You can move it, store it, take it to a friend's house. For lots under a quarter acre or renters, this is a real advantage.
Cleaning: 5 minutes. Burn off residue, brush the stone, done.
Hybrid / Modular Freestanding Ovens (Alfa Forni, Forno Bravo Primavera)
This is the middle ground—factory-built insulated ovens with better thermal mass than a portable steel unit, but no pour-your-own-dome commitment. Brands like Alfa Forni and Forno Bravo make units that come on legs or carts, hit 900°F+, and have real refractory floors.
Cost: These are not cheap. Expect to start around $3,000 for a quality unit, and up from there. Verify current pricing with your dealer or their website—I've seen these shift year to year.
What I've seen in client installs: These work well when you're building a full outdoor kitchen and want the oven integrated into a counter with brick or stone surround. They look intentional. They perform. They're also heavy—some need a dedicated poured slab.
Setup Reality Check
A few things that trip people up:
Distance from the house. This is not one-size-fits-all. Read your specific oven's manual—manufacturers publish clearance requirements and they vary by model. Then check your local codes on top of that, because municipalities add their own requirements. Don't guess on this one. Grab the manual, call your local building department if needed.
Wind direction. Figure out your prevailing breeze before you lock in placement. Nothing kills a pizza night like smoke blowing into your patio seating area for two hours.
Wood storage. You need dry hardwood—oak, hickory, cherry. Fruitwood is excellent for flavor. You need it cut to 12–16 inch lengths, split small (2–3 inches diameter for a portable oven, larger splits for a brick dome). Where does it live? Build a simple firewood rack close enough to be convenient, far enough that you're not storing combustibles against the oven. If you're new to working with wood and fuel, building a fire pit first teaches you the basics of wood management and outdoor structure building.
The base. Portable steel ovens need a stable, level, non-combustible surface or their own manufacturer's stand. Check your oven's specific guidance—requirements vary by model. When in doubt, use the manufacturer's stand on a heat-rated pad. I've seen people improvise on this and end up with scorched surfaces they didn't expect.
Brick dome on a slab: You need a reinforced slab or at minimum a 4-inch concrete pad. A full dome setup can weigh 1,500–2,500 pounds. Grade and drainage matter too—frost heave will crack a poorly supported base over a few winters.
The One Thing That Changes Everything
Here it is. Write this down.
Get the cooking floor above 750°F before you launch a single pie. My target is 850–900°F.
I'm speaking from what I've cooked and what I've seen. Dough style and hydration will affect your ideal floor temp, but across everything I've baked and every pizza night I've watched go sideways, the cause is almost always the same: insufficient temperature.
People fire up their oven, slap a pizza in at 550°F because they got impatient, and end up with a chewy, pale crust that took 8 minutes. That's not pizza. That's flatbread with toppings.
Real Neapolitan-style pizza cooks in 60–90 seconds at 850–900°F. The crust chars at the edges. The bottom blisters. You need an infrared thermometer to actually check the floor temp—not the dome temp. The floor is what cooks the crust.
Callout tip: Get an infrared thermometer—basic models run $20–40 at hardware stores, though prices vary. Point it at the cooking stone before you launch your first pie. If it reads below 750°F, wait. This single habit is the difference between great pizza and expensive flatbread.
Every other piece of advice I give about pizza ovens is secondary to this.
Three Ovens I'd Actually Recommend
Prices shift and product lines get updated. Verify current pricing directly with manufacturers or retailers before you buy.
Budget Builder: Ooni Karu 2 Pro
Multi-fuel (wood, charcoal, gas with optional burner attachment). Solid build quality. Hits high temps fast—around 15–20 minutes. The larger cooking surface is worth the step up if you're regularly feeding a family; you want the extra stone surface area when the floor is recovering between pies.
What I like: Heats fast, consistent results once you learn to manage the fire. Widely available. Good accessories ecosystem.
What to know: The gas burner attachment is sold separately—worth it for weeknight pizza without managing a wood fire. Check current pricing on both the oven and the attachment directly on Ooni's site before you budget.
All-in estimated budget: ~$1,000–$1,200 with stand, cover, peels, thermometer, and your first load of wood. Confirm current prices.
The Committed Setup: Alfa Forni 4 Pizze
If you're building a dedicated pizza station and want something that looks and performs like a permanent installation, the Alfa Forni 4 Pizze is what I'd spec. Twin-wall insulation holds heat well, and the stainless exterior handles weather. Fits a 13-inch pie with room to rotate.
Client installs I've done with this oven have held up well over multiple seasons. No cracking issues. Consistent performance.
Current pricing runs in the $3,000+ range—verify with your dealer. An all-in install with a proper poured stand or integration into an outdoor kitchen counter adds to that.
DIY Brick Dome: 36-Inch Pompeii-Style
If you want the real thing and you're comfortable with masonry work, a Pompeii-style brick dome is a project I'd call intermediate-to-advanced DIY. Forno Bravo publishes free plans and detailed materials lists online—start there for a realistic sense of scope and what materials will run in your area.
36-inch interior diameter is the sweet spot for a home setup. You can cook one 12-inch pizza at a time comfortably. With proper thermal mass, you'll bake 6–8 pies on a single firing and have heat to spare for roasting vegetables or bread afterward.
Material list basics: Refractory bricks (firebrick) for the floor and dome, castable refractory for filling and shaping, insulating ceramic fiber blanket, an outer shell of regular brick or stone for weather protection, and a chimney flue kit.
Realistic labor: Two solid weekends for the dome, not counting the foundation (which should be poured and cured before you start). Then 5–7 curing fires over two weeks before you cook anything. Rush this and the moisture in the mortar steam-cracks your dome. If you're getting comfortable with weekend-length DIY builds, this is the logical next step after smaller projects.
The result? Better thermal performance than most store-bought units at the material cost. And it's yours—you built it.
Bottom Line
If you're on the fence, here's how I'd think about it:
Start with a quality portable steel oven if you want to test whether your family will actually do this regularly before committing serious dollars. It performs well, it's forgiving, and if you end up using it 30 times a year, you'll know you're ready for a permanent install.
Go hybrid freestanding if you're integrating into an outdoor kitchen build and want a permanent fixture without the DIY masonry commitment.
Build the brick dome if you already know you're a pizza person, you want to learn something real, and you're okay with a 2-month build project. It's deeply satisfying to cook in something you made.
Just don't buy any of these without the infrared thermometer and without committing to learning the fire. The oven doesn't make the pizza. Getting the floor to 850°F and launching your dough at the right moment—that's what makes the pizza.
Your call, but measure twice.
You Might Also Enjoy
- Early March Backyard Checklist — Before you install any outdoor structure, walk your yard and plan strategically
- Build a Fire Pit This Weekend — Another outdoor cooking installation that teaches fire and fuel management
Travis Kowalski is a general contractor in Raleigh, NC, and the owner of a backyard that has seen better days but makes great pizza. He's built outdoor kitchens for clients across the Triangle and will tell you what works even when it's not what you want to hear.